When I try to explain what tempeh is to a person who isn’t familiar with it, it never ends up sounding very appetizing… well, it’s cooked, hulled soybeans that have been mixed with a special mold spore and incubated for about 24 hours until a thick layer of white mold grows throughout the beans.
Yummm…… moldy soybeans……
I swear though, tempeh is actually very delicious — a little nutty, chewy in a great way, mild but with a unique earthy flavor — I love it and eat it at least a few times a month.
I used to make the mistake that I am sure many people make when first making tempeh — not steaming the tempeh before using it. Typically when I would buy tempeh, I would simply cut it into cubes, lightly fry it in a mixture of butter and oil, then serve the cubes with a flavorful dipping sauce. It was acceptable, but the texture was quite dense.
Then, after seeing a mention of it on an Indonesian cooking website, I tried steaming the tempeh cubes for about 15 minutes before frying them. And the result was fantastic! The dense texture that I wasn’t wild about changed to perfectly chewy with enough body to keep things interesting.
Since I like tempeh so much, I decided to make it from scratch to understand the process. As many of you know, I have a thing for making things from scratch — tofu, jam, pickles, limoncello, gravlax, sauerkraut, and sausage to name a few. Tempeh had been on my to-make list since seeing the recipe in Sandor Katz’ book, Wild Fermentation (a fantastic book with great explanations of fermentation at home, plus recipes for more unusual tempehs — I highly recommend it). The process isn’t very complicated (much easier than making tofu from scratch in my opinion), but it does take a good two days from the time you start to soak the soy beans to when you have finished tempeh. Thankfully, patience is something I have a lot of.
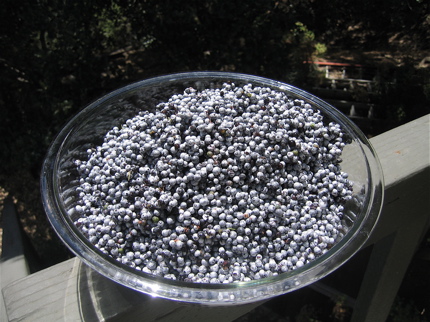
The two most difficult parts of the tempeh making process are 1) acquiring the tempeh spore, and 2) hulling the soy beans. For problem 1, I bought my tempeh spore from Budiman Food in San Jose, CA. I just sent them an email and asked for enough tempeh starter to make a few batches of tempeh. A good sized package cost somewhere in the vicinity of $5-$10. For problem 2, I decided to remove the skins of the beans by pinching each one after they had been soaked but before they were cooked. This took me the better part of an hour for the pound of soy beans. Some might call it tedious, but I prefer to think of simple repetitive cooking tasks like this as meditative…. I just checked out the Budiman Food website again after not visiting for a few months, and I see they now sell tempeh making kits that include already hulled soybeans! Talk about two birds with one stone.
Anyway, if you’re feeling adventurous and have some free time on your hands, I recommend you try making tempeh at home! The process is fascinating as well as being a nice way to spend a lazy weekend.
Homemade Tempeh
Adapted from Wild Fermentationby Sandor Katz
1 lb dried soy beans, soaked overnight in plenty of cold water
2 T vinegar
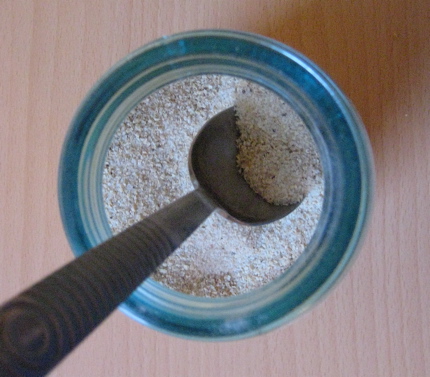
1 t. tempeh sporeHull the soaked soybeans. This is the most tedious part of the whole process. Pinch each soybean between your fingers to separate the skin from the bean. Discard the skins, and put the beans into a large cooking pot.
Cover the beans with cold water so that they are covered by about 2-3 inches. Bring to a boil, reduce heat to medium low, and cook until beans are almost cooked, about 1 – 1 1/2 hours. Stir the beans every now and then, and remove any leftover hulls that float to the top.
When the beans are nearly done (the beans should be slightly underdone — they will continue to soften during the incubation process), drain the beans, discarding the cooking water. Spread the beans over a large kitchen towel, and dry with another towel. Dry the beans very well — one of the main reasons for failed tempeh is too-damp beans. After drying the beans, you may even consider spreading them over a different dry towel and allowing them to air dry for another 2-3 hours (or even overnight).
Mix the beans with the vinegar and tempeh spore, and spread evenly into a 9×13 inch baking dish. Poke holes every inch or so in a piece of aluminum foil large enough to cover the baking dish. Press the foil fairly tightly over the beans.
Incubate the beans at 85-90 degrees for somewhere between 24 and 36 hours (longer at cooler temperatures). I incubated my tempeh in the oven with just the pilot light on. For the first 12 or so hours, not much will happen. Eventually, patches of white mold will begin to appear. Then the mold will start to fill all of the spaces in between the beans. The tempeh is done when there is a solid coating of white mold, and patches of black being to appear (probably near the air holes in the foil). The finished tempeh may have the distinct smell of ammonia — this is ok, and totally natural.
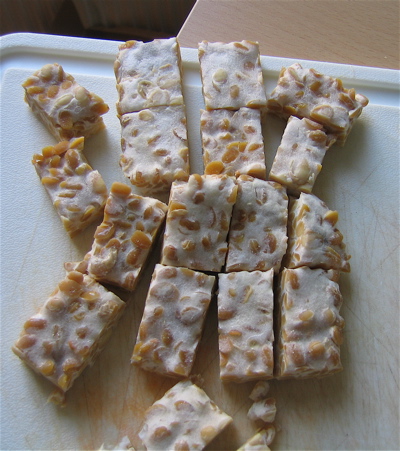
Cut the tempeh into large squares and either use immediately, refrigerate for up to 3 days (allow tempeh to fully cool before refrigerating, otherwise it will continue to incubate), or alternatively, cut into smaller pieces, steam for 10-15 minutes, then freeze for up to two months.
To cook, cut the tempeh into cubes, steam for 15 minutes, then fry in your favorite fat — butter, olive oil, bacon drippings, etc. Serve with a flavorful dipping sauce. Enjoy!
« Alone in the Kitchen with Pork Belly | Home | Creamed Fava Beans with Bacon (Fèves au Lard Fumé) »